10. Billing & Payments
10.1 How Billing Works
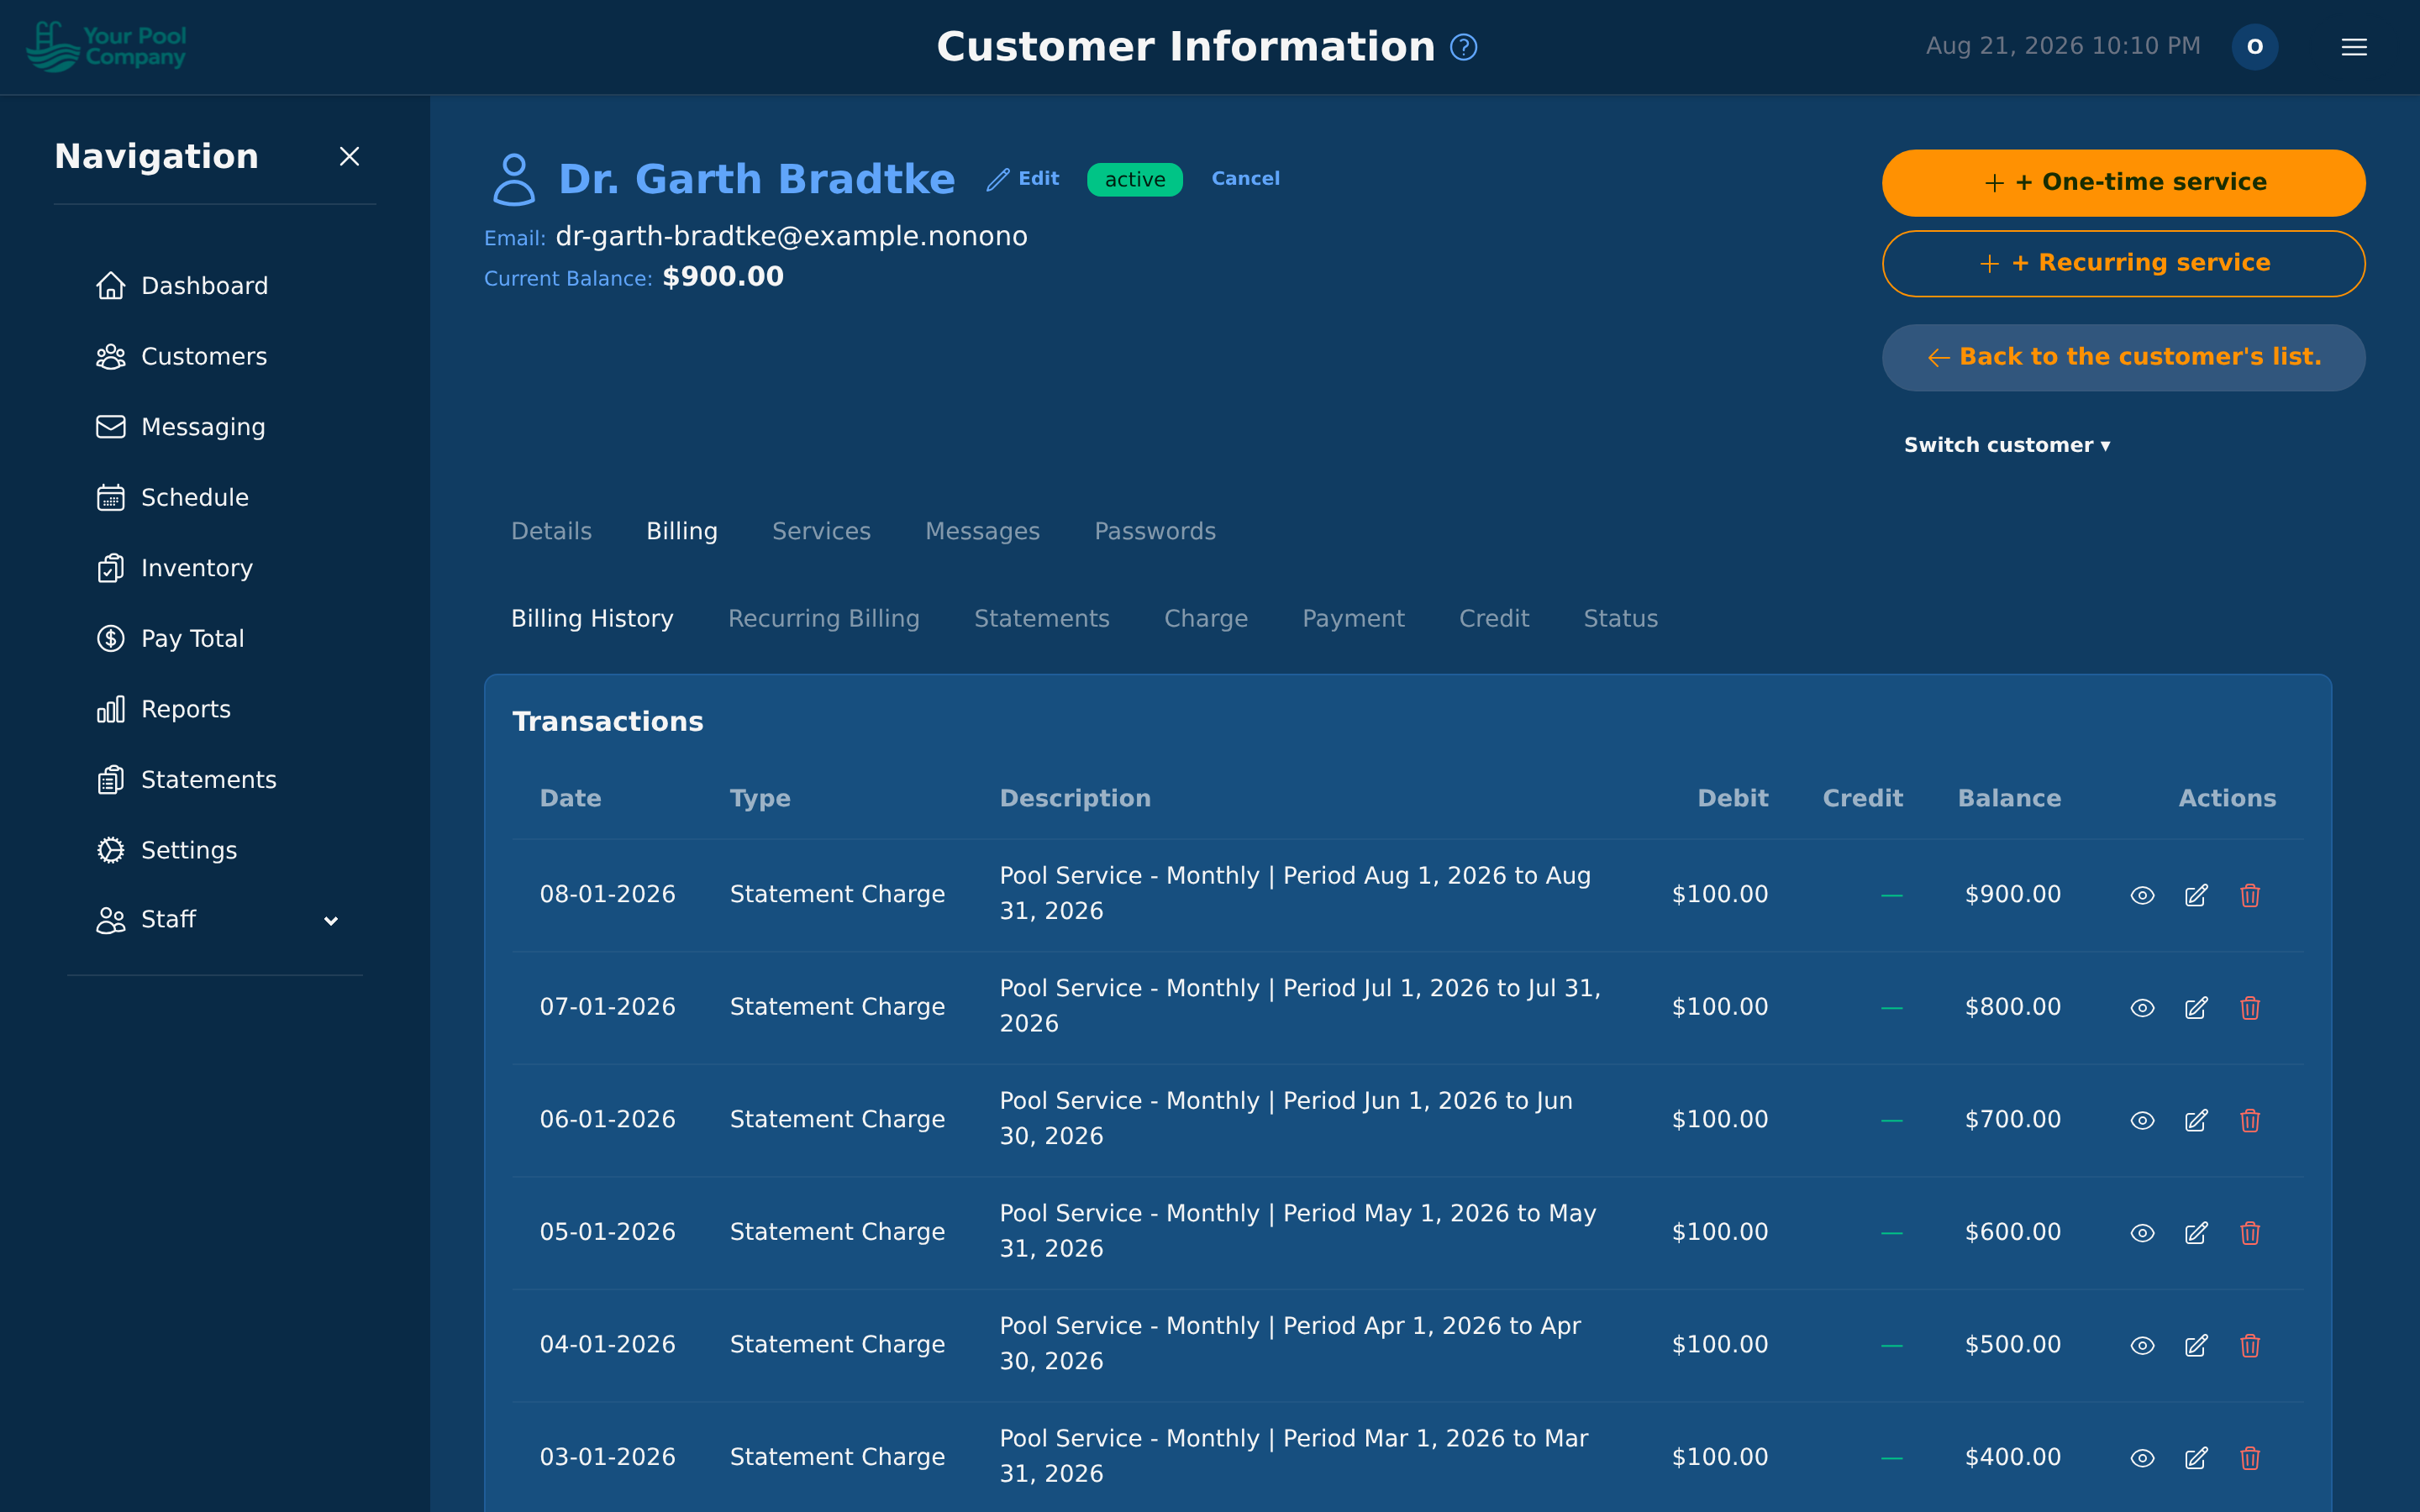
The billing system operates on a ledger model. Every financial event creates an immutable financial transaction on the customer's ledger:
- Service charges (positive — customer owes more)
- Payments received (negative — customer owes less)
- Credits (negative — customer owes less)
- Late fees (positive — customer owes more)
- Refunds (negative — reduces a previous payment)
- Sales tax (positive — added to charges)
The customer's current balance is the sum of all their financial transactions. A positive balance means they owe money; a negative balance means they have a credit.
10.2 One bill — the statement
Whichever billing method you use, a customer gets one running bill: their statement. There is no second document to send, chase or reconcile.
A statement covers a period, and it is in one of two states:
| State | What it means |
|---|---|
| Open | The period is still running. Charges, payments and credits land on it as they happen |
| Closed | The period has ended. The statement is finalised with an opening balance, everything that happened during the period, and a closing balance |
The billing method changes when a charge lands on that statement, not what the customer receives:
- Per-Service — a charge is posted the moment a job is finished, so the statement fills up visit by visit.
- Monthly Statement — the period's charges are collected and closed together.
A closed statement can be emailed to the customer automatically, downloaded as a PDF, or read in the customer portal. See 10.4 for the detail, and Section 2 for how the two methods are set.
10.3 Charges dated in the future — the "Scheduled" badge
Some charges are posted before the money is due. That happens when you sell a one-off job and choose Now, dated… with a date still to come (see Section 8), or when you post-date a charge yourself.
A charge like that sits on the customer's account marked Scheduled. It means: this is agreed, but it isn't due yet.
While a charge is Scheduled:
- It shows on the customer's Billing page so you and your staff can see it's coming.
- It is not counted in their current balance.
- It does not appear on their statement, so the customer isn't billed for it early.
On the date you set, it stops being Scheduled and behaves like any other charge — it joins the balance and appears on the statement covering that date.
Changing the date: open the charge and edit its date. Useful when a customer asks to be billed later.
10.4 Statements (Monthly Mode)
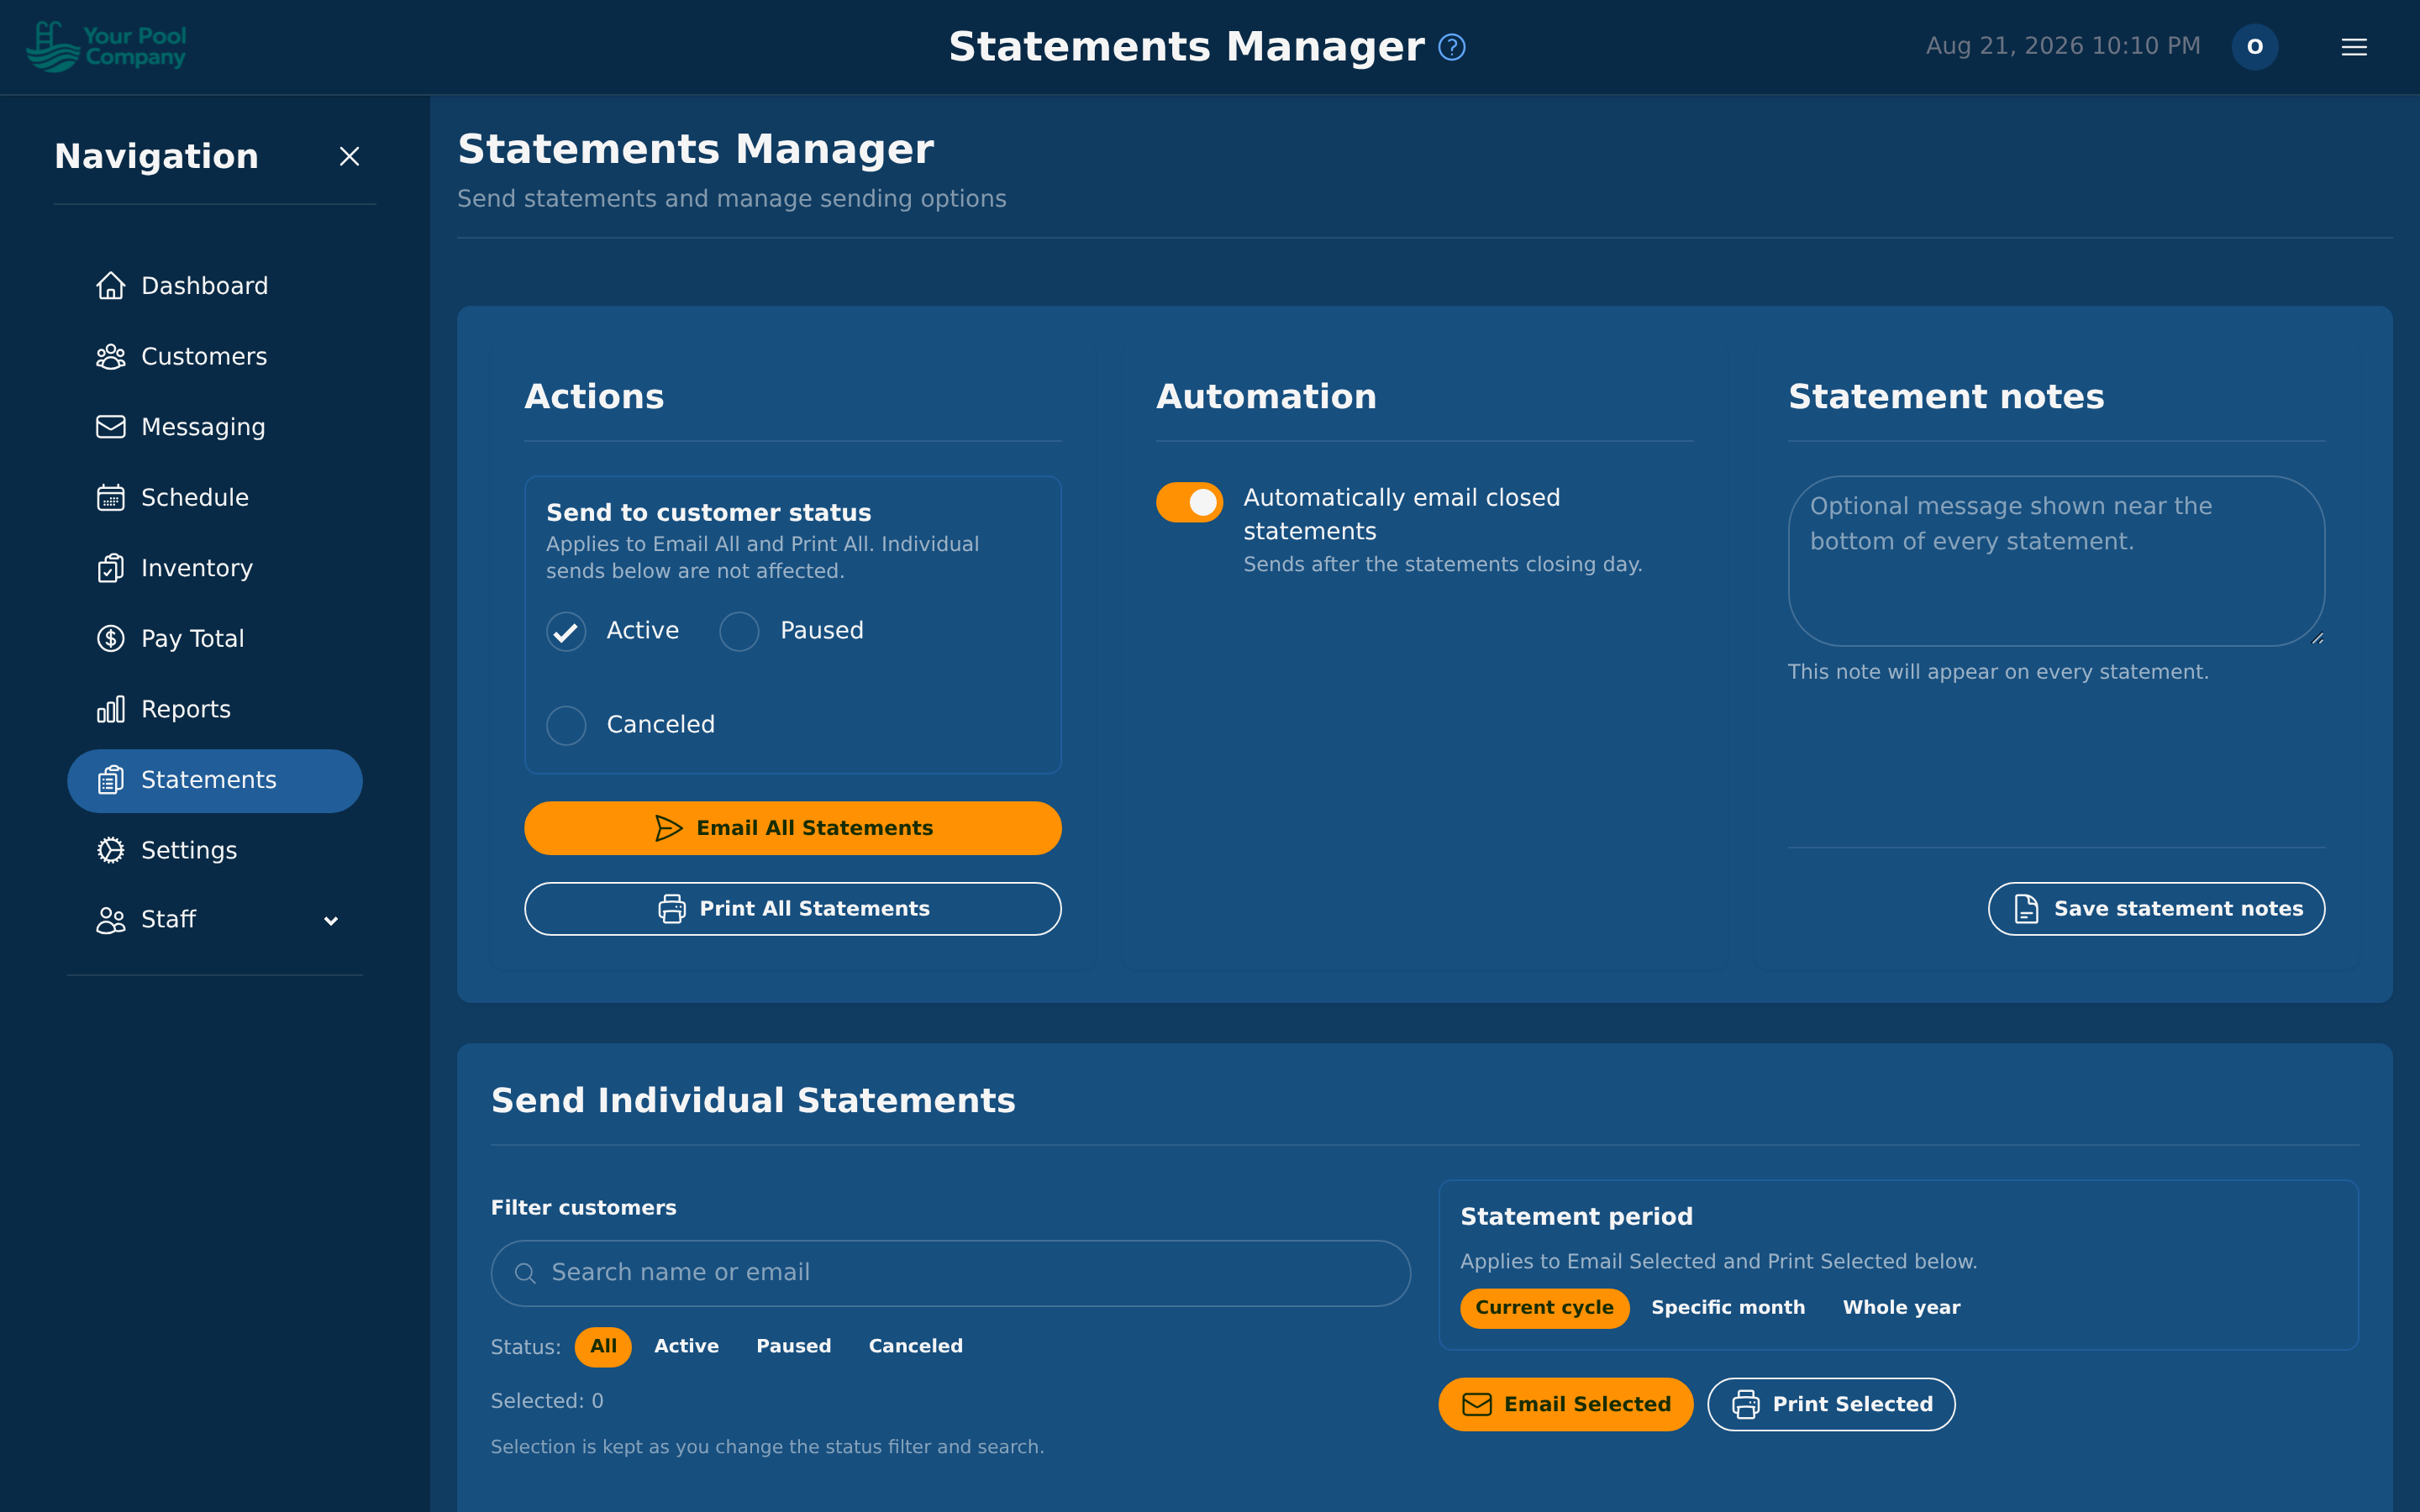
If you're using the Monthly Statement billing method:
- Each statement covers a period (e.g., March 1–31).
- During the period, all completed services, credits, payments, and fees are recorded as financial transactions.
- At the end of the period, the statement is closed with:
- Opening balance (carried from previous statement)
- All transactions for the period
- Closing balance
- The statement can be:
- Emailed to the customer automatically.
- Downloaded as PDF.
- Viewed in the customer portal.
Statement Day: the anchor day of the month for statements and due dates (1–28).
Statement Integrity: Each statement has a cryptographic signature to ensure transaction data hasn't been altered.
To chase customers who haven't paid, sending each one their statement with your own message, see Past-Due Notices below.
10.5 Past-Due Notices
Past-due notices let you pick the customers who owe you money, write one message, and email each of them their current statement with that message on top, all in one go.
Open it from the Send past-due notices → button on the Statements page, or on Reports → Balances.
It works in four steps: choose who to chase, write the message, confirm, and watch it go.
1. Choose who to chase
The panel on the left filters your customers. The count and the total owed at the top update as you change it.
- Owes now: unpaid statements that are already due. This is on by default, and it's the one to use. Add at least $ to leave out small amounts.
- Account balance: everything on the account, including charges posted ahead of their due date.
- Time: No payment in a number of days (credits and discounts don't count as payments; tick Include customers who have never paid to keep them in), or Owed for at least a number of days, counted from the oldest charge still unpaid. Any time turns this off.
- Account: which subscription statuses to include (Active, Paused, Canceled). Customers with no subscription are always included.
- Skip anyone sent a notice in the last 7 days is on by default, so nobody gets chased twice in a week. Untick it or change the number of days if you need to.
Every matching customer appears in the table, ticked. Untick anyone you want to leave out. Customers who can't be sent a notice stay in the list, greyed out, with the reason. For example, no email on file means you'll need to print or phone that one. Customers marked as preferring paper are emailed anyway.
Click Continue to message →, or Save as draft to come back later.
2. Write the message
- Pick a saved message from Template, or write a new one. Save as new… keeps it for next time; Update saves changes to the template you picked. Templates, at the top of the page, is where you edit, copy or archive them.
- Write a Subject and a Message in plain text. A blank line starts a new paragraph.
- The buttons under Insert add details that change for each customer:
customer_name,company_name,past_due(the amount owed now),balance,last_payment_date,days_since_payment,owing_since_dateandportal_link. Click one to drop it in where your cursor is. If a tag is typed wrong, you'll get a warning and can't send until it's fixed.
The Preview on the right shows exactly what one customer will receive, with their real amounts filled in. Use ‹ prev and next › to step through the list. Your message sits above the standard wording, which is always kept, so every customer still gets their statement PDF and the link to pay in the customer portal.
Before sending for real:
- Send test to me emails you the notice for the customer on screen, attachment and all.
- Dry run goes through the whole list without sending anything, and shows who would get a notice and who would be skipped.
3. Confirm
Click Review & send … notices →. The confirmation shows how many notices will go out and the total being chased. If that total looks wrong, a filter is probably set wrong, so go back and check it. Above 25 recipients you'll be asked to type SEND to confirm.
Each customer is checked again at the moment their email goes out. Anyone who has paid in the meantime is skipped automatically.
4. Watch it go
The run page shows each customer as Sent, Waiting (handed to your mail server, no result yet), Failed or Skipped, with the reason. From there you can:
- Retry … failed to send the failed ones again, as a new run.
- Print the … who can't be emailed to get their statements on paper.
- Export CSV for your records.
- Cancel run to stop anything not yet sent. Notices already handed to your mail server can't be recalled.
Run history, at the top of the page, lists every past run. Each customer's Messages tab also shows the past-due notices they've been sent.
10.6 Autopay
Autopay automatically charges a customer's saved payment method when their bill falls due.
Enabling Autopay for a Customer:
- The customer saves a payment method (credit card, or PayPal) — either through the portal or you can add it on their behalf. Automatic payments run on cards and PayPal; bank transfers are for one-off payments (see 10.12).
- The customer opts in to autopay.
- Mark one payment method as the default autopay method.
- When the bill falls due, the system automatically charges the default method.
Autopay Retry Schedule: If a payment fails (e.g., declined card), the system retries according to your configured retry schedule. For example:
- Retry 1: 3 days after failure
- Retry 2: 7 days after failure
- Retry 3: 14 days after failure
After all retries are exhausted, the system can optionally disable autopay for that customer and send a notification.
10.7 Manual Payments
You can record payments made outside the system:
- Open the customer's billing tab.
- Click Record Payment.
- Enter the amount, date, and payment method:
- Cash
- Check (enter check number)
- Venmo
- Wire transfer
- Other
- The payment is posted to the customer's ledger and reduces their balance.
10.8 Credits & Debits
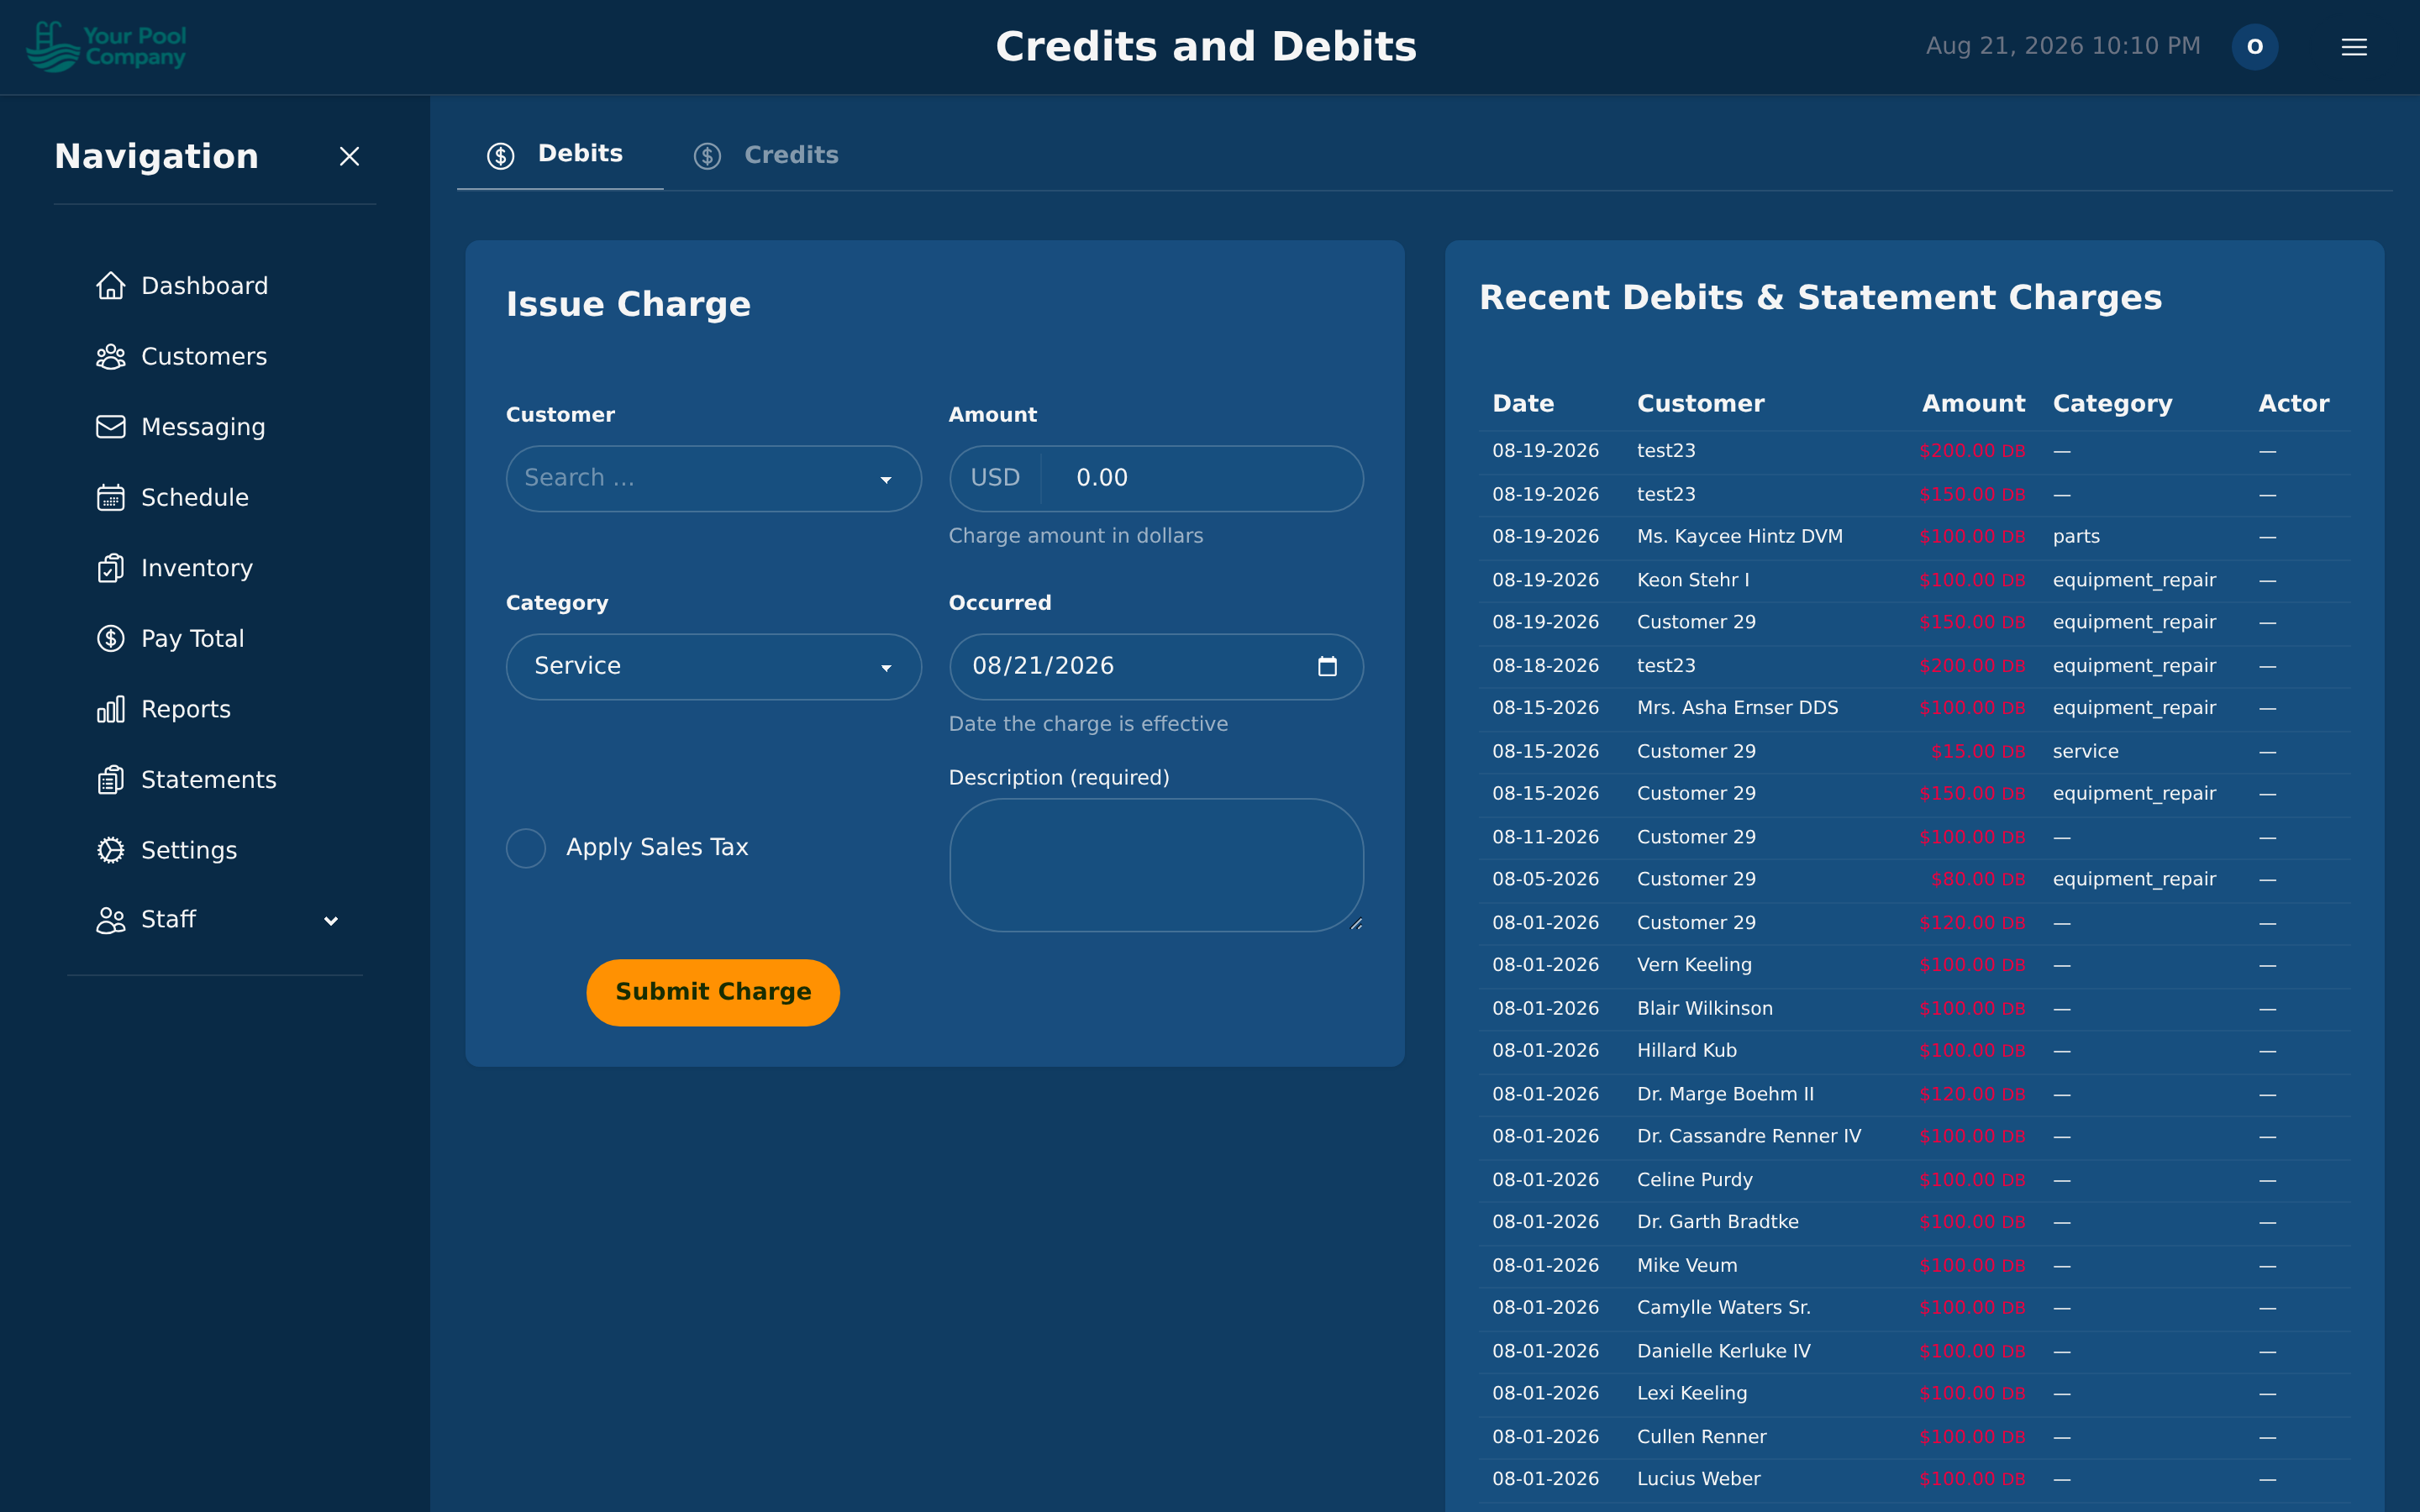
Issuing a Credit:
- Use credits for adjustments, goodwill discounts, or promotional offers.
- Open the customer's info page, go to the Billing tab, then click the Credit sub-tab.
- Enter the amount, reason, and description.
- The credit is posted as a negative transaction, reducing the customer's balance.
Issuing a Debit (Manual Charge):
- Use debits for one-time charges outside of regular services (e.g., repair charges, supply fees, service call fees).
- Open the customer's info page, go to the Billing tab, then click the Charge sub-tab.
- Enter the amount, customer, and description.
- The charge is posted as a positive transaction, increasing the customer's balance.
Confirmation Thresholds: To prevent accidental large credits or refunds, you can set a confirmation threshold (e.g., require confirmation for credits over $500) in Settings.
10.9 Refunds
To refund a payment:
- Open the customer's billing tab and find the payment.
- Click Refund.
- Enter the refund amount (full or partial).
- Select a reason: Duplicate, Service Not Rendered, Goodwill, Pricing Error, or Other.
- Add optional notes.
- The refund is processed through the original payment gateway and recorded on the ledger.
10.10 Late Fees
If late fees are enabled (see 2.6), they are automatically applied when:
- A statement is past its due date.
- The grace period has elapsed (e.g., 15 days after due date).
- There is still a balance owing.
Late fees appear as a separate Late Fee transaction on the customer's ledger. The fee amount depends on your configuration (flat amount or percentage of balance, with an optional maximum cap).
Per-Subscription Override: You can override the late fee grace period on individual subscriptions. For example, give a long-standing customer a longer grace period without changing the company-wide default.
10.11 Failed Payments & Retry Logic
When an autopay charge fails:
- The payment is recorded with a Failed status.
- The customer's autopay failure count is incremented.
- The system schedules a retry based on your retry schedule (Settings > Company, Payments section).
- If configured, the customer receives a notification about the failed payment.
- If all retries are exhausted:
- Autopay can be automatically disabled for the customer.
- An admin alert is generated so your team is aware.
- The subscription may be auto-paused if you've enabled that feature.
10.12 Bank Transfers (ACH)
If you have enabled bank transfers (Settings > Payments — see 2.2), customers see a second button in the portal: Pay by bank. It suits large bills, where the fee saving is real — typically 0.8% capped at $5, against roughly 2.9% + 30¢ on a card.
This runs entirely on your own Stripe account. EZ Pool Biller never touches the money. It is worth being clear about what that means in practice:
- The feature must be switched on in Stripe, not only here. ACH Direct Debit has to be active on your Stripe account before the option appears (see 2.2). Stripe may review your account first.
- The money lands in your Stripe balance and pays out to your bank on your Stripe payout schedule — exactly like your card takings. Changing when you get paid is a Stripe setting, not a EZ Pool Biller one.
- Stripe sets the fee, not us. The percentages in this manual are Stripe's published ACH pricing at the time of writing; your own rate is whatever your Stripe agreement says. The ACH fee you configure in EZ Pool Biller is a separate thing — it is what you choose to pass on to the customer.
- Bank details never reach EZ Pool Biller. The account is confirmed on Stripe's own secure screen, and we only ever store the bank name and last four digits for display.
- Refunds, disputes and payout questions are Stripe's records. We show what happened on the customer's ledger; the authoritative history — and anything you need to contest a dispute — lives in your Stripe dashboard.
If you close or disconnect your Stripe account, bank payments stop working immediately, in the same way card payments would.
What the customer does: they choose the bank option, sign in to their bank through Stripe's secure screen to confirm the account, and approve the payment. They never type an account number into EZ Pool Biller, and we never see or store it.
The one thing to know: bank transfers are not instant.
| Card | Bank transfer (ACH) | |
|---|---|---|
| Money confirmed | Seconds | 3–5 business days |
| Typical cost | ~2.9% + 30¢ | 0.8%, capped at $5 |
| Maximum payment | $5,000 | $25,000 |
Between the customer approving and the money clearing, the payment sits in a pending state:
- The customer sees "payment on its way" on their dashboard, and their balance still shows the amount owed.
- The balance is not reduced yet — reducing it before the money arrives would be wrong if the transfer later fails.
- No late fee is charged on a balance a pending bank payment covers, so a customer who pays on the last day is not penalised for the clearing time.
When the money clears, the payment posts to the ledger and the balance drops, dated to the day the customer paid — not the day it cleared. Their statement reads as if it landed when they authorised it.
If a transfer fails (closed account, insufficient funds, a bank return), nothing is posted to the ledger, the balance stays open, and both the customer and your team are emailed. Bank returns can arrive several days after the payment, which is why the balance stays visible until the money is genuinely confirmed.
Disputes: if a customer disputes a settled bank payment, the payment is flagged for manual review rather than reversed automatically, and your team is alerted. Review their ledger and record a refund if that is the right outcome.
Automatic payments currently run on cards and PayPal only. Bank transfers are for one-off payments — a customer can pay any bill from their bank whenever they like, but cannot yet put a bank account on autopay.